Introduction
In the world of fursuits, every detail is essential. The legs of a fursuit are crucial to the look and feel of a character.
In this article, we’ll explore all about fursuit legs. We will look at different styles, discuss how to build them, learn about the best materials and how to keep them in shape.
But this guide is more than just instructions. It’s about the fun of making and maintaining something unique.
Understanding Fursuit Legs: Types and Styles
Fursuit legs are not just part of a costume. They bring your character to life. Each style of fursuit legs has its unique look. Understanding these styles will help you make your choice. You can choose the one that best suits your character and is comfortable for you. Let’s take a look at one style at a time.
Plantigrade Legs
Plantigrade legs in fursuits are like human legs. These legs stand and walk like us, with the whole foot flat. When you make a fursuit with these legs, the goal is to copy the straight shape of human legs. This makes the suit comfortable and easy to move around in. It’s a good choice if you’re new to fursuits or like a natural look.
Plantigrade legs are easier to make than other styles. They don’t need extra padding or complicated moulding. For the material, you should choose something that is both flexible and strong. It should allow you to move easily and also last a long time.
A big advantage of plantigrade legs is that they’re comfortable to wear. They’re less heavy and ideal for hot days or long wear. These legs also suit many costumes. You can use them for realistic animals or fantasy creatures.

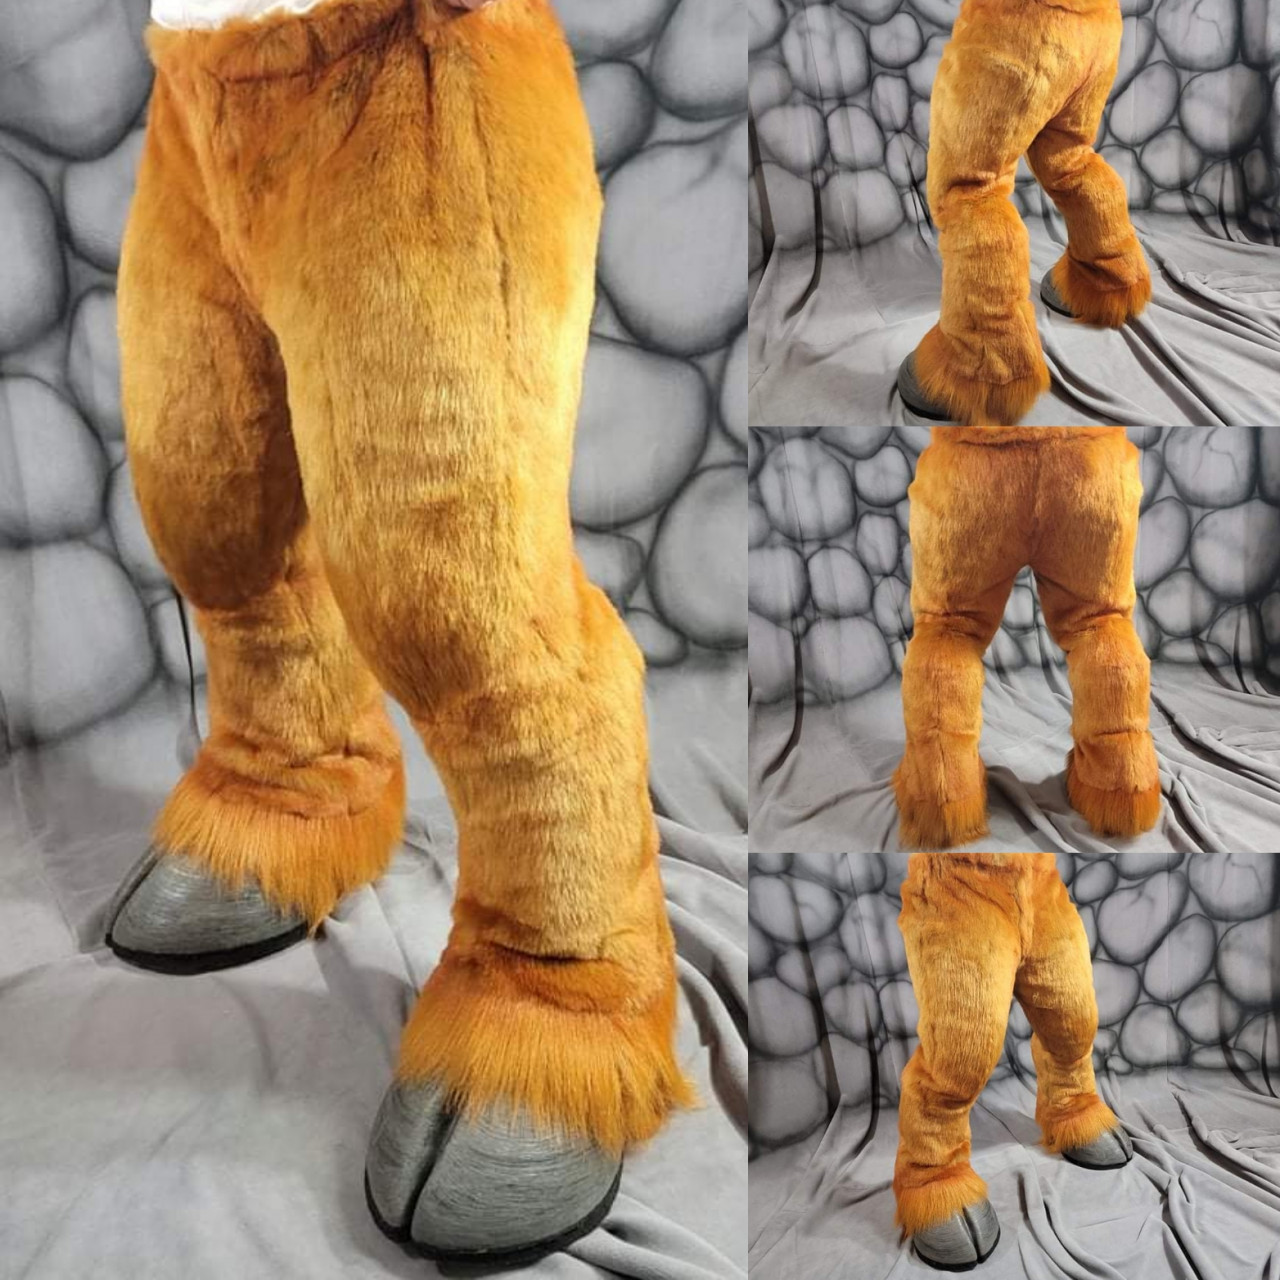
Fursuit Legs of a Deer Fursuit
Image via Furaffinity
Digitigrade Legs
Digitigrade legs are different and have a special look. These legs stand out because they look like the legs of animals such as dogs and cats. Animals walk on their toes, and the digitigrade legs mimic this. They make the fursuit look more like an animal. They give it height and a lively shape. These legs are a good choice if you want your fursuit to look animal-like.
The production of digitigrade legs is more complicated than that of plantigrade legs. They need additional padding to give them the shape of animal legs. This padding is usually made of lightweight foam. It provides the right shape and allows you to move. The challenge is to make the legs look real and still be comfortable.
Digitigrade legs are popular because they make a big difference to the look of the fursuit. They transform a simple costume into something that looks like an animal. They’re more costly to make and wear, but many people find it worth it.
You need to think carefully when choosing the fur for these legs. The fur should accentuate the particular shape of the legs. It can be different lengths or colours. The fabric should allow you to move well and last a long time.
Materials and Tools Needed
The production of fursuit legs, whether plantigrade or digitigrade, requires various materials and tools.
Materials
When making fursuit legs, choosing suitable materials is crucial. Each material has a special role. It influences how the fursuit looks and feels and how long it lasts.
-
Faux Fur
This is what people see first. It’s the fur on the outside. There are many types of faux fur. They come in different colours and lengths. Think about your fursuit character when choosing the fur. Some characters need a long coat, others a short one. The fur should also be robust. It must be able to withstand a lot of movement.
-
Foam for Padding
This is especially true for digitigrade legs. The foam moulds the legs and makes them look real. Use light, flexible foam. It should be easy to cut into the right shape. But it must also be firm enough to keep its shape.
-
Lining Material
The inside of the legs needs a lining. It makes the fursuit more comfortable. Use a fabric that is soft and breathable. It prevents the foam from rubbing against your skin. It also helps with sweating if you wear the suit for a long time.
-
Thread
A good thread is crucial. It holds the coat and the lining together. The thread must be strong. Fursuit legs move a lot, so the thread needs to keep everything tight.
-
Fasteners
These can be zippers, buttons or Velcro fasteners. They help to open and close parts of the fursuit. They must be sturdy. You’ll use them often.
-
Elastic Bands
These help ensure that the suit’s parts fit well and move correctly. They must be tough. They will stretch a lot when you move.
Tools
The right tools are required for making fursuit legs. Each one has a particular job. They make the work easier and better.
-
Sewing Machine
This tool is not a must, but it helps a lot. It sews faster and more neatly than hand sewing. It’s really good for long, straight stitches. If you plan on sewing a lot of fursuits, a sewing machine is a good thing to have.
-
Scissors and Cutters
You need a good pair of scissors for cutting fabric and fur. They should be sharp and made for cutting fabric. For foam, use a foam cutter or an electric knife. They will help you to cut the foam cleanly and get the desired shape.
-
Measuring Tape
When making fursuits, it is important to be precise. A flexible tape measure is a must. It helps you to measure your body and the materials correctly. This ensures that the fursuit fits well and is easy to move around.
-
Glue and Adhesives
You need different adhesives for the other parts of the work. Fabric glue sticks foam to fabric. It must be solid and flexible. A hot glue gun is also helpful for quick fixes and tiny details.
-
Marking Tools
When you cut and sew, you must mark where you want to cut and sew. Use pens, markers or tailor’s chalk. They should be visible on the fabric but also easy to remove.
-
Pattern Paper
If you make your patterns, you can decide what you want your fursuit to look like. Pattern paper is used to draw these patterns before you cut the fabric. This is really helpful, especially for beginners.
-
Needles and Pins
You need different needles for sewing by hand. Some things cannot be sewn with a machine. Pins hold the fabric in place before sewing. They ensure that everything is in line and that you can sew accurately.
Designing Your Fursuit Legs
Designing is not just about how the legs look. It’s also about being creative and practical and making sure they’re comfortable. You can choose realistic digitigrade legs or simple plantigrade legs. Either way, this is where your fursuit starts to come together.
Initial Sketching and Planning
The first step in designing fursuit legs is sketching your ideas. This is where you start turning your thoughts into an actual design.
-
Sketching the Basic Outline
Your first step is to draw a rough shape of the legs. Concentrate on the general look you want to achieve. Think about whether you want them to look strong, sleek, or animal-like. Draw them from different angles to get a complete picture. It’s okay if it’s not perfect; this is just the beginning.
-
Adding Details
Once you have a basic shape, add more details to your sketch. It includes the length and type of fur, unique markings or features such as scales and how they should look. If you are designing digitigrade legs, take into account the shape changes caused by the padding. For plantigrade legs, consider how you want the fabric to drape and move.
-
Considering Movement
When designing a suit, it’s essential to consider how the legs will move and bend, as this will impact the overall comfort of the suit. It’s a good idea to sketch out where the legs will bend and consider how the material will react to movement.
-
Refining Your Design
Go back to your sketches and make adjustments. This may mean changing the proportions, the shapes or the details. You need to try different things to find out what works best.

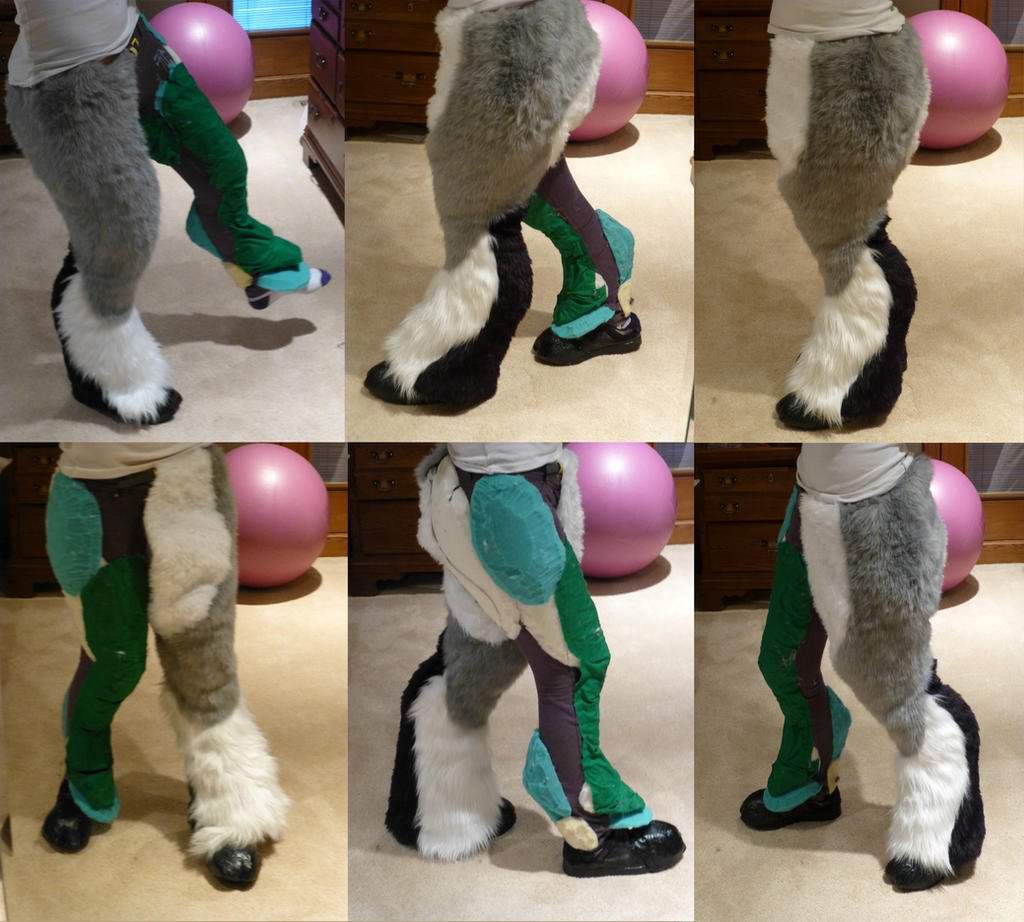
Fursuit Leg Base
Image via Amino Apps
Selecting Fabrics and Colours
Choosing the right fabrics and colours is the key to giving your fursuit legs. This step is essential for both the look and function of your suit.
-
Fabric Types
Faux fur is often used for fursuit legs. It looks natural and is available in many variations. Long, shaggy fur is good for the appearance of wild animals. Short fur is good for pets or slender characters. Think about how long the fabric will last and how easy it is to clean.
-
Underlying Fabrics
Use a firm, stretchy fabric under the coat. Lycra or Spandex are an excellent choice. They support the coat and ensure that the suit fits well. They should stretch and then return to their shape. This will keep the suit looking good for a long time.
-
Colour Considerations
Colour brings your character to life. Think about how colours look in a different light. Some colours look different inside and outside. Also, think about how the colours work together. This includes any patterns or markings your character has.
-
Texture and Patterns
The texture of the fabric can make your suit more authentic. Choose fabrics that look natural. If your character has special markings, you may need to add them yourself. You can do this with an airbrush or sew in different coloured fur. This requires care, but it will make your character more authentic.
Construction Techniques
Now, let’s move from planning to making your fursuit legs. We will cover different ways to make both plantigrade and digitigrade legs. Each type has its methods and tricks.
Sewing Your Fursuit Legs
Sewing turns your fabric into fursuit legs. The first thing you need to learn is the fabric grain. This is the way the fabric is woven. You need to align your patterns with this grain. This is very important, especially with stretchy fabrics like lycra or spandex. It ensures that the fabric stretches properly and retains its shape.
Once you have understood the fabric grain, the next step is to cut the fabric. You should use your final pattern for this. Don’t forget to add extra fabric to the edges. This is important so that the suit fits properly. If you’re cutting faux fur, make sure that you only cut the underside. Avoid cutting the fur itself. This will keep the fur looking good.
Now, you need to pin the fabric pieces together. This helps to keep them in line when sewing. Then, sew the seams. A straight stitch is sufficient for most fursuits. However, use a zigzag or stretch stitch for stretchy fabrics. It allows the seams to stretch without tearing. The legs of the fursuit move a lot, so you should reinforce the seams. This is particularly important in areas such as the crotch and knees.
Once the main seams are finished, you must hem the edges. Hemming makes the suit look neat. It also prevents the fabric from fraying.

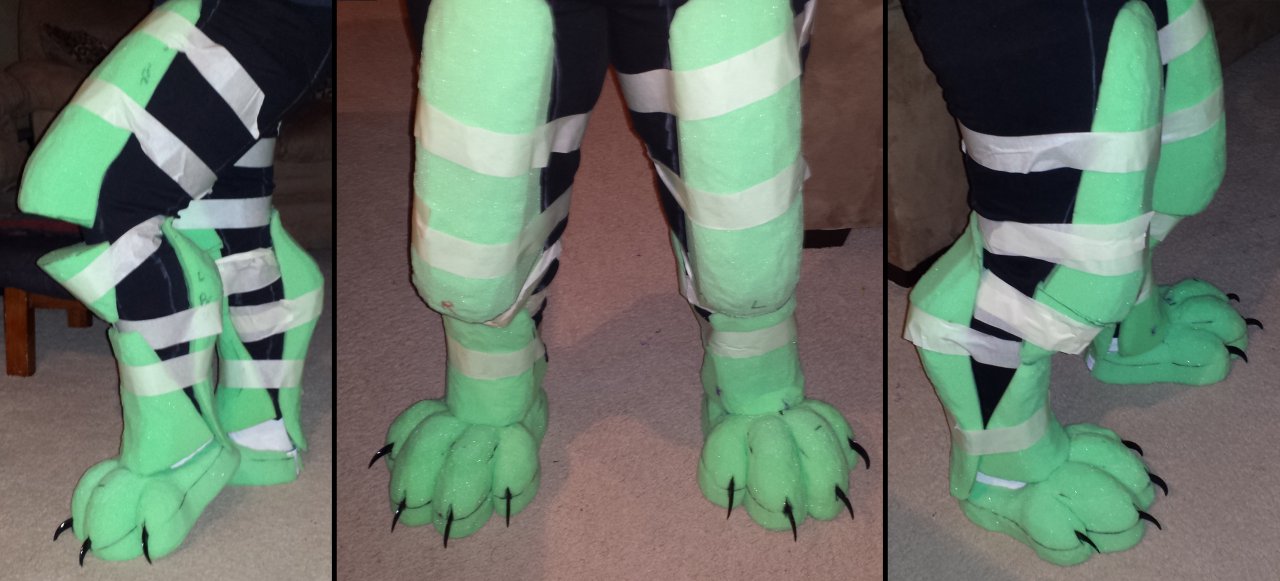
Fursuit Legs Foam Base
Image via Furaffinity
Padding for Digitigrade Legs
The production of digitigrade legs for a fursuit is a special task. These legs imitate animals that walk on their toes, such as dogs or big cats. The proper padding is crucial. It shapes the legs and influences how the suit moves.
First, you need to understand the animal’s leg structure. Digitigrade animals have unique legs, large calf muscles and a raised heel. Next, choose the foam. Padding foam is good because it is flexible but firm. It should be lightweight but also strong enough to keep its shape.
The main work is to shape the foam. First, cut it into rough muscle and bone shapes. Then, carve these parts so that they look like real animal legs. Lay the foam on top of each other to form the leg shape.
After shaping, attach the foam to the base of the fursuit legs. This base can be a pair of tight trousers or a layer of lycra. Glue the foam in place with strong glue or sew it by hand. It must fit securely, but you must still be able to move. You can cover the foam with the same fabric as the rest of the fursuit. This can be done by sewing it onto the base or creating a removable cover.
Maintenance and Care
Looking after your fursuit legs well is essential. It keeps them looking good and lasting long. Here’s how you can take care of them:
Cleaning and Washing
Clean the legs of your fursuit often, especially if you wear it frequently. For minor tints, spot cleaning with a mild detergent is sufficient. If they need to be cleaned thoroughly, check the instructions for the fabric. Some suits can be washed in the washing machine on a gentle cycle. Others must be washed by hand. Always use a mild detergent.
Drying
The right way to dry them is crucial. Do not use a dryer with high heat. This can damage the fabric and the coat. Instead, gently squeeze out the water. Then, let them air dry. You can use a fan to hasten up the process but don’t use direct heat.
Brushing the Fur
To keep the coat looking good, brush it regularly. Use a coarse-toothed comb or a special synthetic fur brush. Brush it gently to untangle knots and loosen up the coat. You should do this, especially after washing, as the coat can become matted when wet.
Storage
Keep your fursuit legs in a cool, dry place when you’re not wearing them. Keep them out of direct sunlight to prevent them from fading. You can hang them up in a garment bag or put them in a big box. This way, they will keep their shape, and the fur won’t be squished.
Repairs
If you see small rips or tears, fix them quickly. This will prevent them from getting worse. Small repairs can be sewn by hand. You will achieve the best results if you stick to the original seams. For larger repairs, you may need professional help.
Refreshing the Look
Over time, the suit may look a little dull. You can use fabric sprays for faux fur to brighten it up. These sprays can bring back the colour and make the suit smell nice. However, test the spray on a small area first.

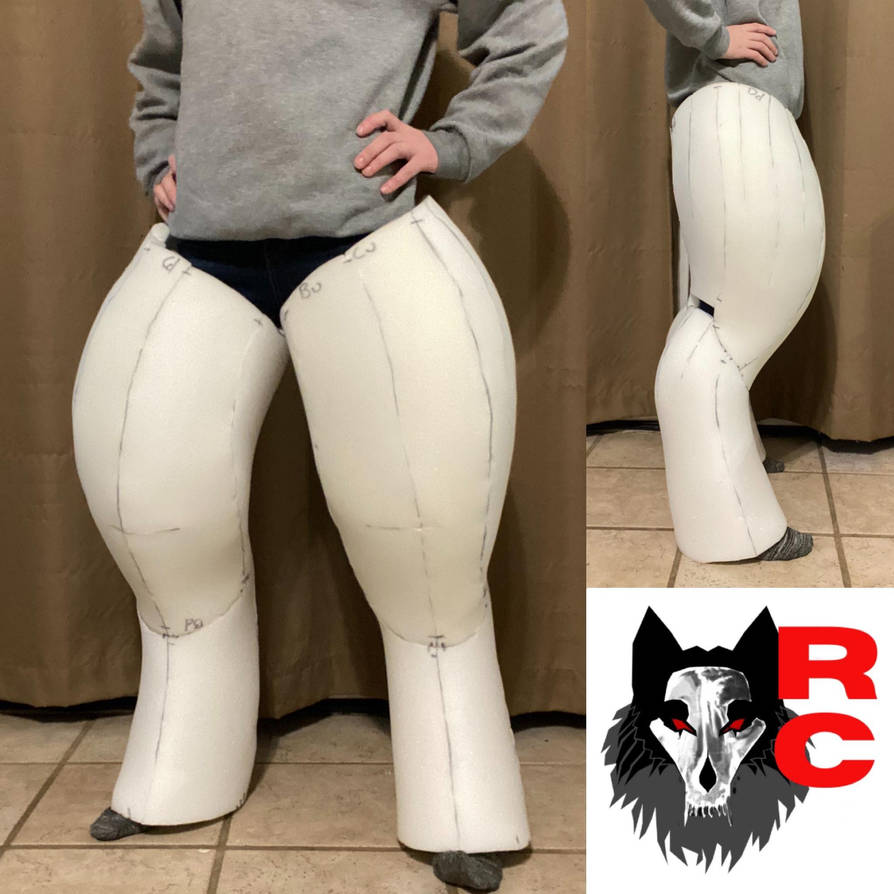
Another Fursuit Foam Leg Base
Image via DeviantArt
Can You Commission Fursuit Legs?
Making fursuit legs yourself is great, but perhaps not possible for everyone. If you’re new to fursuit making or need a costume quickly, you can have fursuit legs made by professionals.
When you place an order, you’ll get quality work from someone with experience. They pay attention to every detail to make the fursuit legs look good. You can find people who make custom fursuits on the internet.
Etsy: Etsy is one of these places. There are many artists there who make fursuit legs. You can look at different styles and choose an artist whose work you like. You can also read reviews from other customers to see how good the artist is.
Fursonafy: Another good place to commission fursuit legs is Fursonafy. Our website is all about fursuit orders. You can find many fursuit makers there. You can discuss your wants and ensure they understand your ideas.
When you commission fursuit legs, you must be clear with the manufacturer. Tell them what you want, e.g. how you want your character to look or whether you want the suit to move in a certain way. You should also talk about how long it will take and how much it will cost before you start.
Takeaway
Our guide is perfect for anyone interested in making costumes. We cover the two main styles: plantigrade, like human legs, and digitigrade, which are more animal-like. We give tips on choosing the suitable materials and tools to make your fursuit last and look good. These steps are the key to a fursuit that not only looks good but moves well, too.
And if making your fursuit seems too tricky, we’ll show you how to commission it from professionals on sites like Etsy and Fursonafy. Whether new to fursuit making or experienced, our guide will help you create impressive fursuit legs that bring your character to life.


