
Introduction
Furry art, a vibrant part of the furry fandom, brings anthropomorphic animal characters to life, blending human and animal traits. The head is often the most expressive part of these characters, making it essential for artists to master.
This guide is designed for beginners and intermediate artists who want to improve their furry head drawings. We’ll cover the basics of anatomy, sketching, and refining your work, helping you create expressive and unique characters.
For additional learning, check out these resources:
Let’s dive in and start creating your furry character!
I. Understanding Furry Anatomy
A. Basic Furry Head Shapes
Before diving into the drawing process, it’s important to understand the foundational shapes that form the basis of any furry character’s head. Furry characters often blend features from various animals, such as canines, felines, reptiles, and even mythical creatures like dragons. Each of these species has distinct head shapes that influence the overall look of your character.
Canine Heads: Typically have elongated muzzles and pointed ears. Examples include wolves, foxes, and dogs.
Feline Heads: Generally more rounded with shorter muzzles and large, expressive eyes. Think of cats, lions, and tigers.
Reptilian Heads: These heads are more angular, often featuring scales and elongated snouts. Dragons and lizards fall into this category.
Custom Creations: Many furry characters combine features from multiple animals, so don’t be afraid to mix and match traits to create something unique.
Understanding these basic shapes will help you maintain consistency and realism in your character designs.
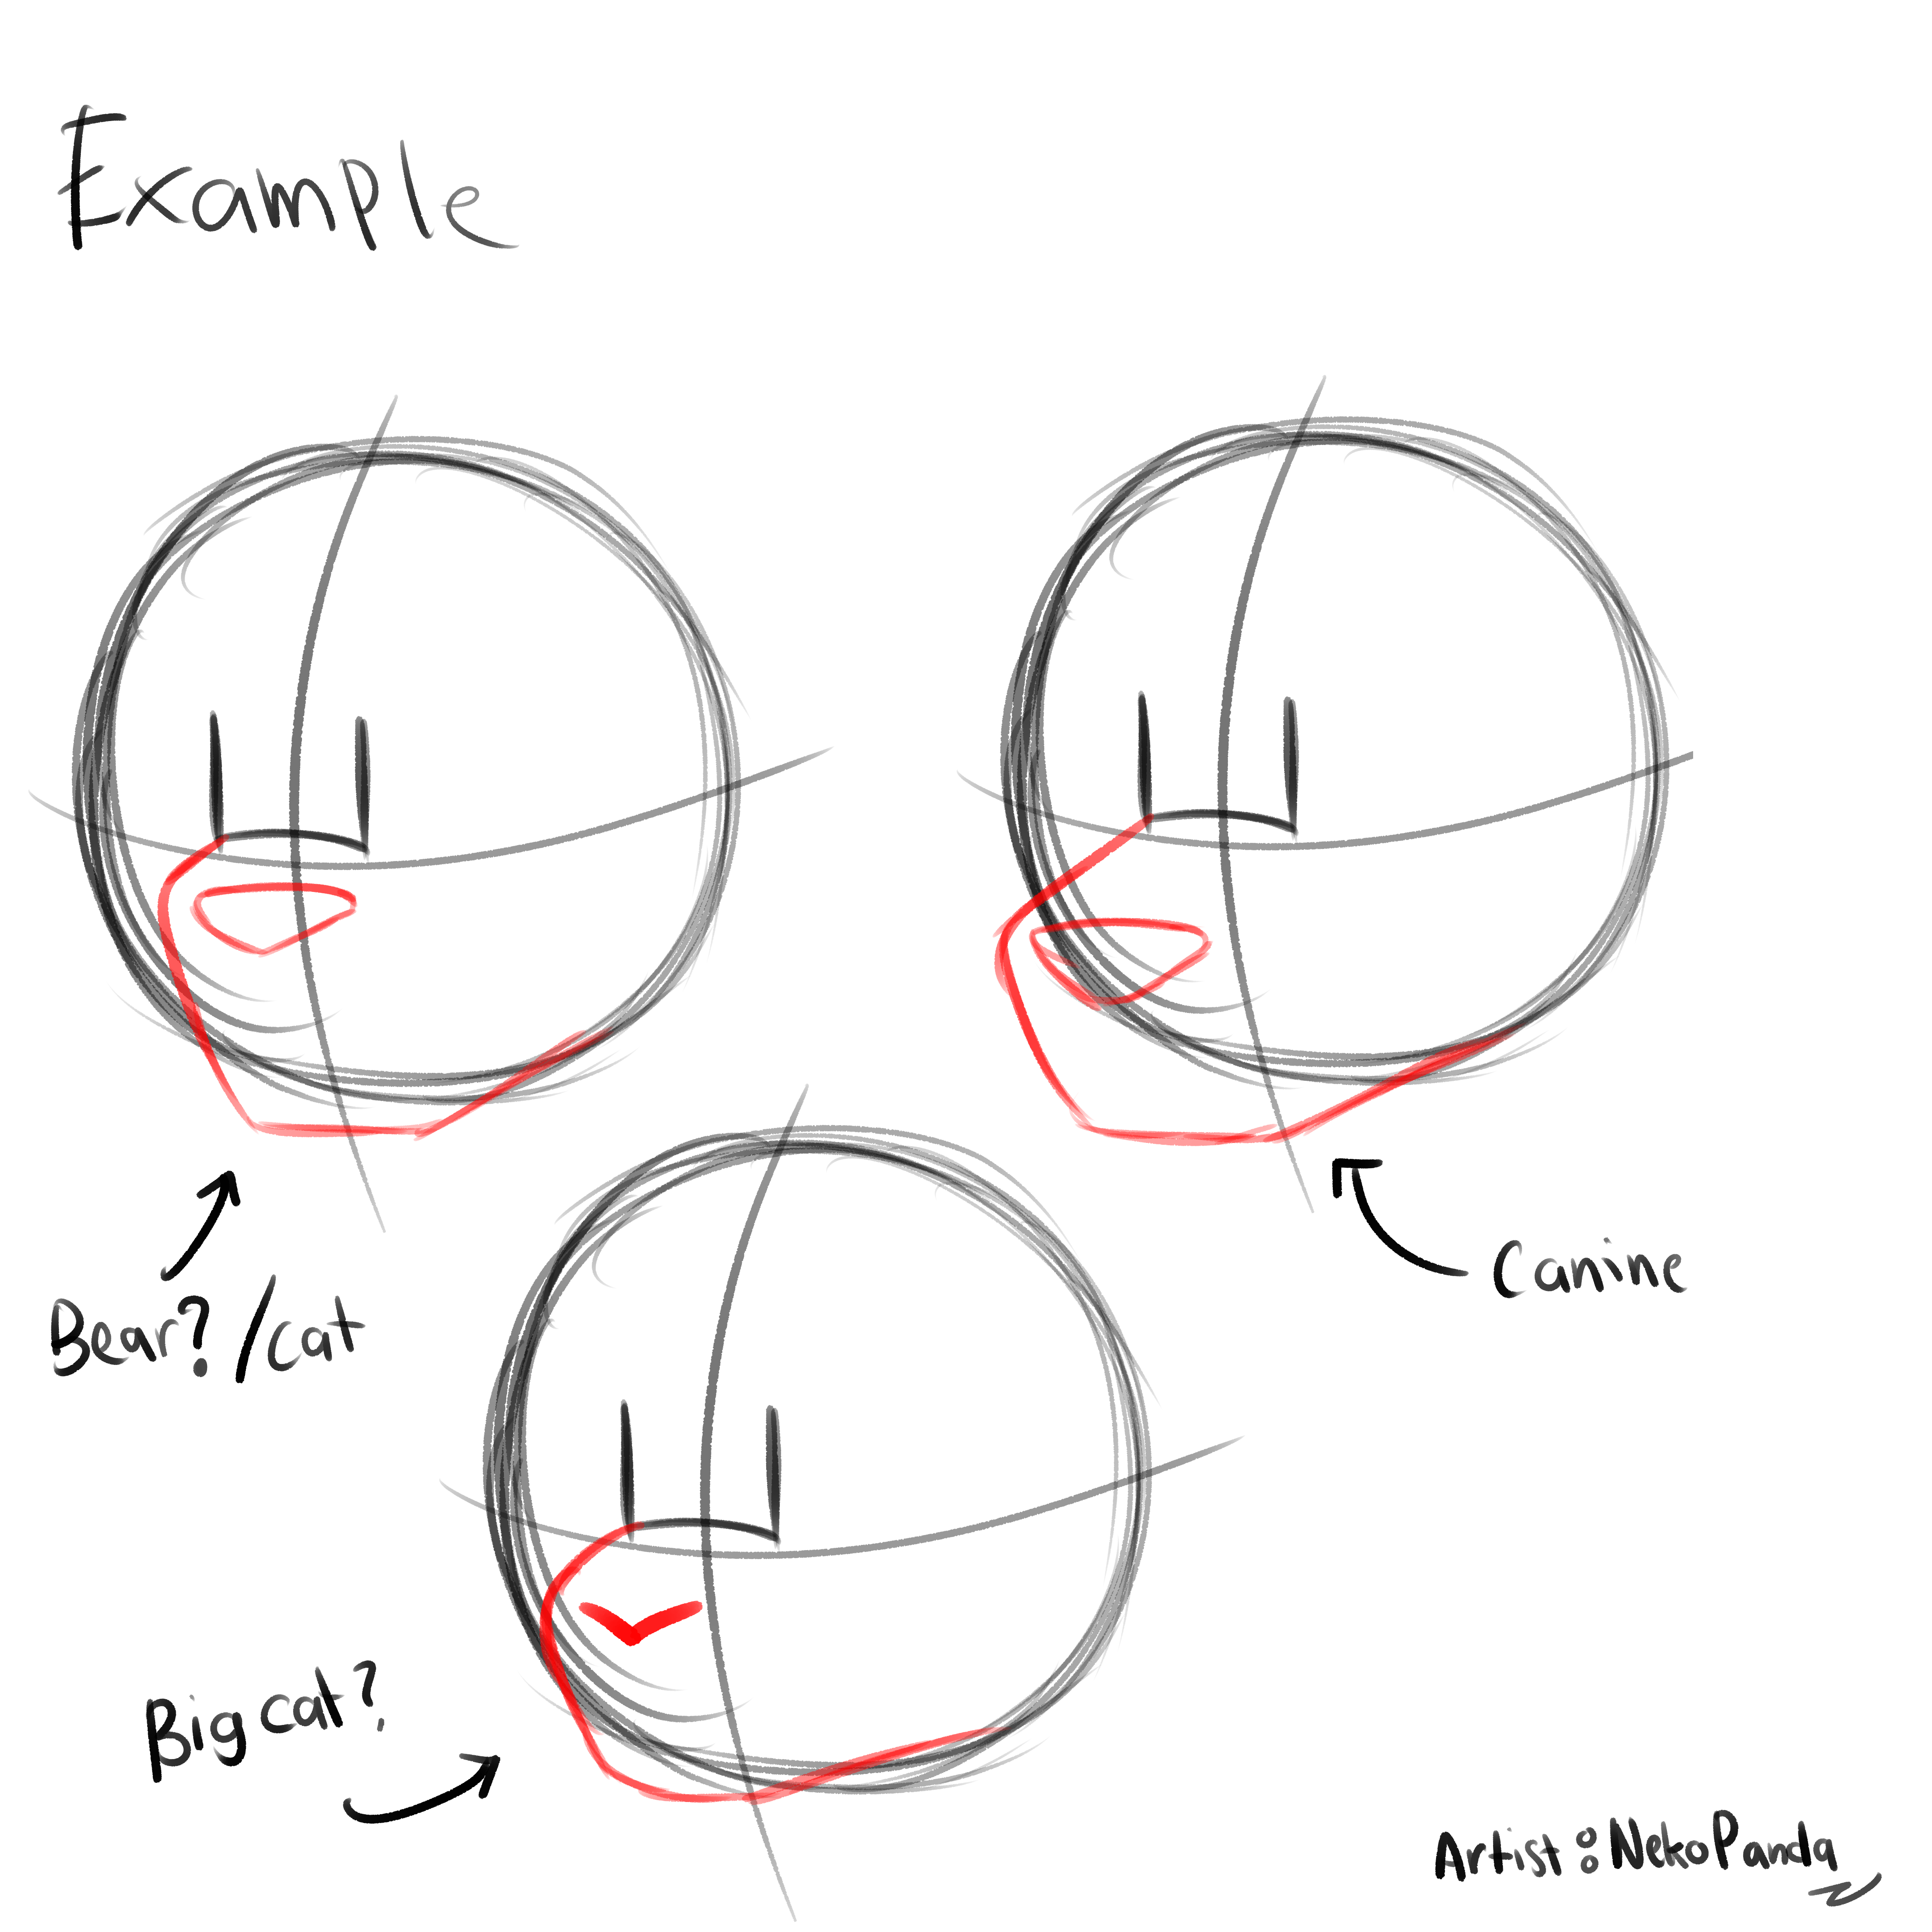
Examples of Different Animal Head Shapes
Image via Reddit
B. Proportions and Structure
Proportions are key to creating a balanced and appealing character. The head is usually broken down into simple shapes—like circles and ovals—that serve as a foundation for more detailed features.
Head Base: Start with a circle or oval that will define the overall size and shape of the head. This helps ensure that the head remains proportionate to the rest of the body if you plan to draw it later.
Guidelines: Draw a vertical line down the center of the head to keep the features symmetrical. A horizontal line across the middle will help you position the eyes, while another horizontal line below can mark the position of the muzzle.
Feature Placement: The eyes are usually placed slightly above the center of the head, with the muzzle extending below. Ears typically start from the top or upper sides of the head, depending on the species.
By mastering these proportions, you’ll create characters that look natural and cohesive, regardless of the species you’re drawing.
This understanding of furry anatomy sets the stage for the next step: sketching the basic structure of your furry character’s head
II. Step-by-Step Drawing Process
A. Sketching the Base
Start with Basic Shapes: Begin by drawing a simple circle or oval to establish the head’s overall size and shape. This will act as the foundation of your drawing.
Add Guidelines: Draw a vertical line down the center of the circle to help keep the face symmetrical. Then, add a horizontal line across the middle of the circle to guide the placement of the eyes. If your character has a longer muzzle, you might want to draw another horizontal line lower down to guide where the muzzle will begin.
B. Defining the Muzzle and Jaw
Sketch the Muzzle: Depending on the species, the muzzle can be short (like a cat’s) or elongated (like a wolf’s). Extend the muzzle from the bottom of the circle, curving it outwards slightly. Use your earlier guidelines to ensure it’s centered and balanced.
Draw the Jawline: Connect the sides of the muzzle back to the base of the head, forming the jawline. This line can be more angular or rounded depending on your character’s species and personality.
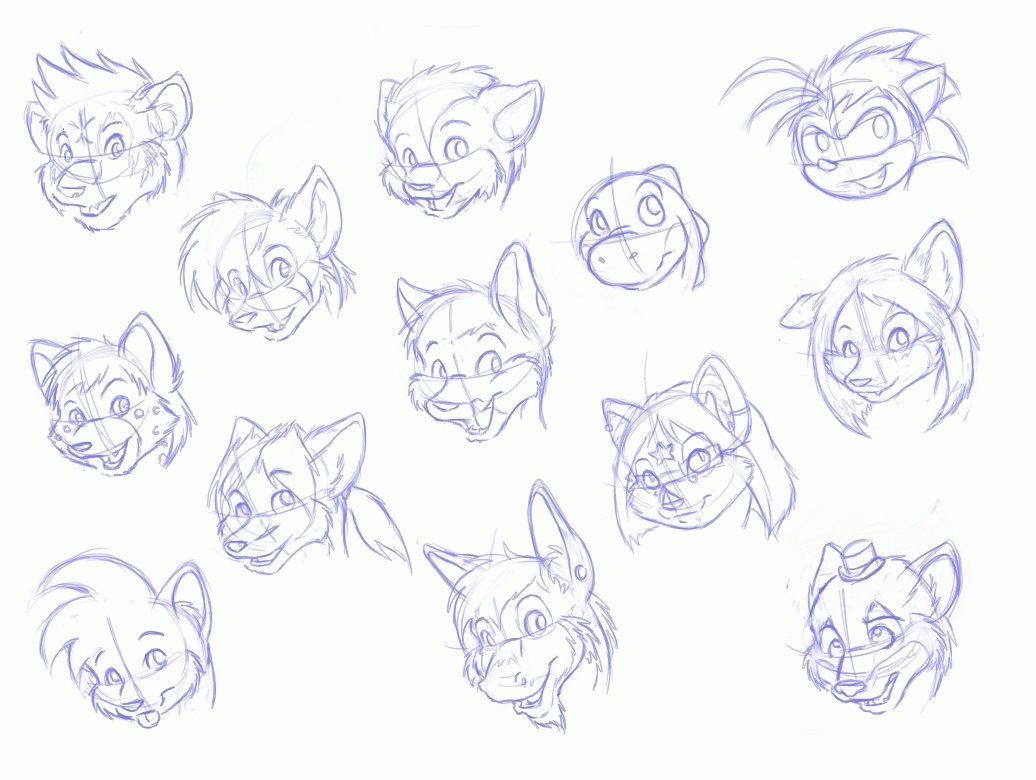
Different Examples of Muzzles and Jaws
Image via DeviantArt
C. Adding Ears
Position the Ears: Ears are typically placed on the top or upper sides of the head. Use your guidelines to ensure they are symmetrical.
Sketch Ear Shapes: Ears can be pointed (like those of a fox or wolf), rounded (like a bear’s), or floppy (like a dog’s). Experiment with different shapes to see what best fits your character’s personality.
D. Drawing the Eyes
Position the Eyes: Use the horizontal guideline to place the eyes. Typically, eyes are positioned slightly above this line, especially in more cartoonish or exaggerated styles.
Explore Eye Shapes: Eyes can be large and expressive (common in many furry characters) or smaller and more realistic. Experiment with different shapes to convey different emotions—rounded eyes for a friendlier look, or narrow, angular eyes for a more serious or sly expression.
E. Adding Facial Details
Nose and Nostrils: Sketch a small oval or triangle at the end of the muzzle for the nose. Add nostrils as small curved lines on either side of the nose.
Mouth and Teeth: Draw a line under the nose to indicate the mouth. For a more detailed expression, you can open the mouth slightly and add teeth or a tongue.
Fur Texture and Patterns: Lightly sketch fur details around the cheeks, forehead, and ears. Consider adding patterns or markings that make your character unique, such as stripes, spots, or patches.
At this stage, you have the basic structure of your furry character’s head. Next, you’ll refine the sketch, adding more details and preparing it for inking and coloring.
III. Refining and Inking the Drawing
A. Cleaning Up the Sketch
Erase Unnecessary Guidelines: Carefully erase the guidelines you used to keep the proportions and symmetry. This will help to reduce clutter and make the final lines stand out. Make sure the final shape still looks balanced and accurate without these guidelines.
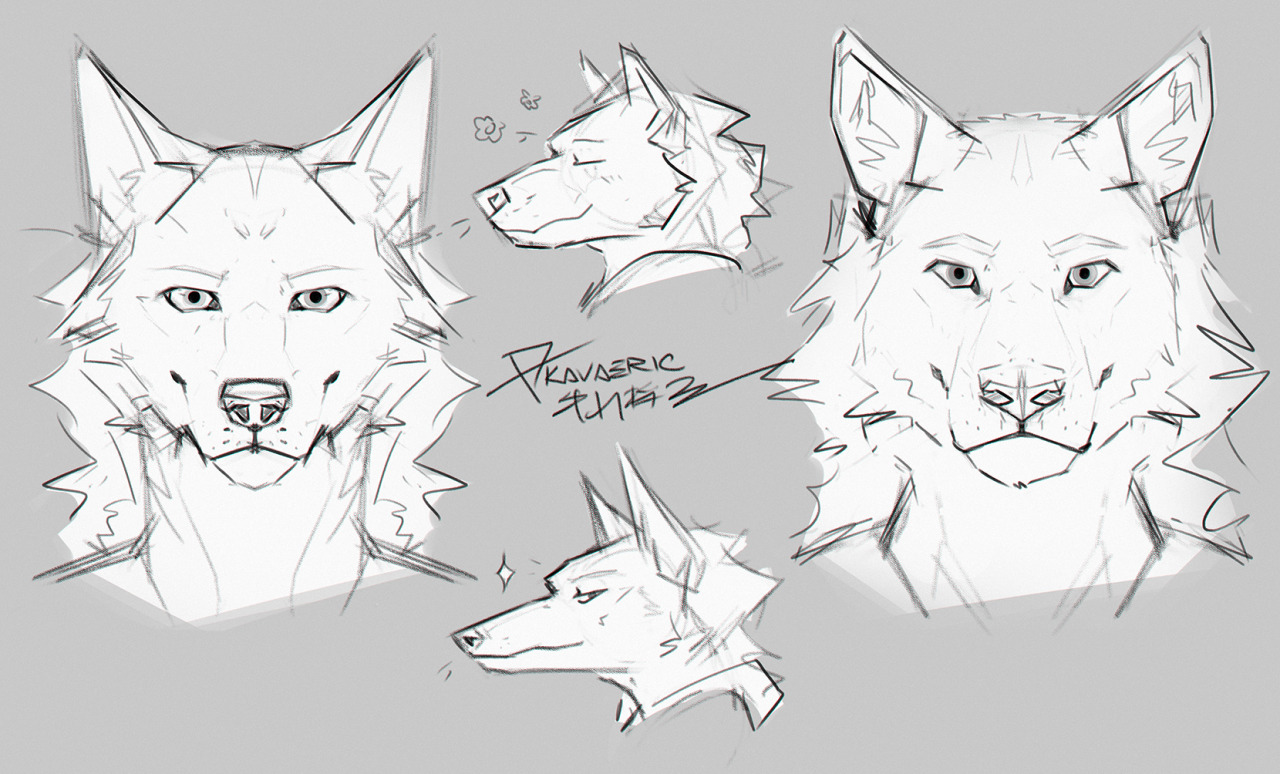
Example of a Cleaned Up Sketch
Image via Tumblr
B. Inking Techniques
- Inking the Outline: Using a fine pen or a digital inking tool, trace over the final lines of your sketch. Apply consistent pressure for a smooth outline, but feel free to vary the line weight (thicker or thinner lines) to add depth and interest. For example, thicker lines can be used along the outer edges of the head and major features, while thinner lines work well for details like fur texture.
- Adding Detail with Line Weight: Use varying line thickness to emphasize different parts of the drawing. For example:
- Thicker lines: Around the outer edge of the head, major features like the ears, and where shadows would naturally fall (e.g., under the chin or muzzle).
- Thinner lines: For details like the inner parts of the ears, fur texture, and fine facial details like the nose or mouth.
- Enhancing Texture: To give the fur a more natural look, use small, quick strokes to add texture around the edges of the face, ears, and along the jawline. This adds a sense of realism and helps define the character’s unique appearance.
- Review and Touch Up: After inking, review your drawing for any areas that may need touch-ups. Smooth out any uneven lines, and add final details where needed. Make sure the inking is consistent and clear.
Once you’re satisfied with the inked drawing, you’re ready to move on to coloring and shading, where the character will truly come to life.
IV. Coloring and Shading
A. Choosing Colors
- Selecting a Color Palette: Choose colors that reflect your character’s personality and species. For example, natural tones like browns and grays work well for wolves, while more vibrant colors can be used for fantasy creatures or stylized characters. Consider the character’s environment and background when selecting your palette, as this can influence how the colors are perceived.
- Base Colors: Begin by laying down the base colors for your character. Start with the primary fur color and fill in the entire head evenly. Use a medium tone that can be shaded darker or highlighted lighter later on. Remember to keep the colors flat at this stage—details and texture will be added afterward.
- Secondary Colors and Markings: Add secondary colors for specific features like the inside of the ears, the nose, and the eyes. If your character has patterns or markings (stripes, spots, patches), apply them now, ensuring they blend smoothly with the base color.
B. Shading and Highlighting
- Identifying the Light Source: Decide where your light source is coming from—this will determine where shadows and highlights fall on your character’s head. A consistent light source is key to making your drawing look three-dimensional.
- Applying Shadows: Use a darker shade of your base color to add shadows. Focus on areas where the light doesn’t hit directly, such as under the ears, along the sides of the muzzle, and under the chin. Gradually build up the shadows to add depth, making sure they blend naturally with the base color.
- Adding Highlights: Use a lighter color to add highlights where the light hits directly. Common areas for highlights include the top of the head, the bridge of the nose, and the tips of the ears. Highlights should be applied sparingly to avoid making the character look too glossy unless that’s the desired effect.
- Enhancing Fur Texture: To make the fur look more realistic, add subtle variations in color along the fur’s natural direction. You can achieve this by using a slightly lighter or darker tone than the base color and applying it in short strokes to mimic the texture of fur.
- Detailing the Eyes: Eyes are a focal point of any character, so take your time to add depth and shine. Use bright highlights in the iris and a small white spot to mimic the reflection of light. This brings the eyes to life and adds expressiveness to the character.
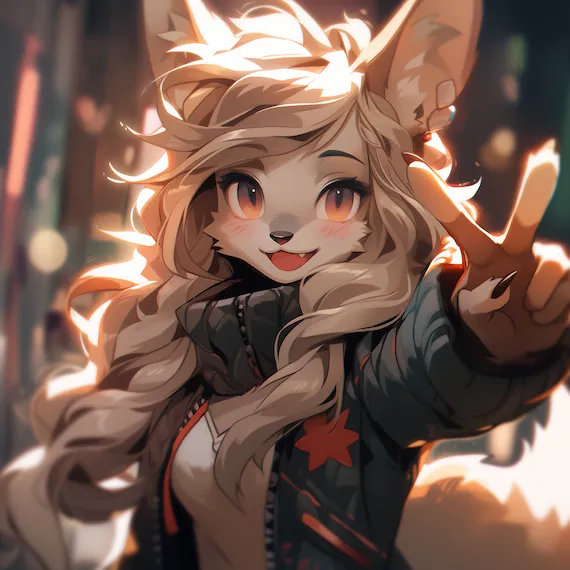
Example of a Completely Coloured Furry Drawing
Image via Etsy
C. Blending and Finishing Touches
- Smooth Transitions: If working digitally, use a blending tool or a soft brush to smooth transitions between shadows, highlights, and the base color. For traditional media, blending can be done using a blending stump, cotton swab, or simply by layering colors gradually.
- Final Adjustments: Step back and assess your work. Make any necessary adjustments to colors, shadows, or highlights to ensure the overall piece looks balanced and cohesive. Add any final touches, like small hairs sticking out or slight color variations to enhance realism.
- Background Consideration: If you plan to add a background, choose colors that complement your character without overpowering it. A simple gradient or a soft, neutral tone can help your character stand out.
At this point, your furry character’s head should be fully colored and shaded, giving it depth and personality. The next step is to consider how you want to present your final piece, whether in a full scene or as a standalone character.
Conclusion
With these final touches and presentation tips, your furry head drawing is ready to be shared with the world. The attention to detail, thoughtful presentation, and willingness to engage with the community can help elevate your artwork and connect you with others who appreciate and share your passion for furry art.


