
What Is A Fursuit?
As Wikipedia defines it, Fursuits are custom-made animal costumes typically owned by members of the furry fandom, better known as furries. People who avidly wear fursuits are known as fursuiters.
The whole idea is that the fursuit is supposed to represent a fursona, which is a whole other can of worms. However, in short, a fursona is a personalized animal character that is usually made to represent a person or personality. In a way, they are almost like an alter ego, and these fursuits are a tangible, wearable version of these alter egos. The suits essentially act as an escape for furries, a way for them to be themselves without facing judgment from others.
What Do I Need To Make A Fursuit?
If owning a fursuit of your own is something that has piqued your interest and you’ve quickly realized that you aren’t willing to pay an arm and a leg for it, a cheaper option for the more creative bunch is to make your very own fursuit. But to start that, you’re going to need some supplies first, so we’ll run you through the essentials for your first fursuit.
Foam
This is likely one of the most important parts of the suit as it makes up 90% of the suit and acts as the foundation of the whole thing. Your best bet is to order high-density upholstery foam just to make your suit as sturdy as possible.
Hot Glue Gun
This is what will be used to stick the fur of the suit onto the foundation of the suit, so it’s important that you have some quality adhesive that isn’t just going to either become brittle and not stick or melt away easily.
Faux Fur
Given the name, this is likely the most obvious on the list and is essential to making the suit.
Plastic Wrap & Duct Tape
It’s unlikely you’ll be able to stick the fur straight onto the foam of the suit as the glues probably won’t take to the foam, so, to combat this you can use plastic wrap and duct tape. Glue is much more likely to take to the non-sticky side of duct tape and therefore acts as a much better base.
Thread & Needle Kit
The thread and needle kit will be used to sew sections of the fur that you cut out together.
Electric Razort
As strange as this may sound, you’ll likely need to shave your fursuit once you have finished it. This is because the raw faux fur is going to be long and slightly messy, so to make it more manageable and sometimes to even style it, you can shave it down with an electric razor.
Vinyl Fabric
As you might have been able to imagine, the material that makes up the pads on the paws is going to be different from the fur on the rest of the suit. This material just so happens to be vinyl fabric which is a lot smoother and a lot more coarse than the fur used on the suit in contrast.
Zipper
Believe it or not, you’re going to need a way of getting in and out of the suit, and the best way of going about that is probably a zipper. They’re easy to use and easy to manage and are therefore a great option for making a fursuit.
Safety
This is what you can use to hold a suit together while hot glue is cooling on certain pieces.
Muslin
This is a thin fabric material that is used to make the torso of the suit. The fur is layered over it to make it appear more like a fursuit.
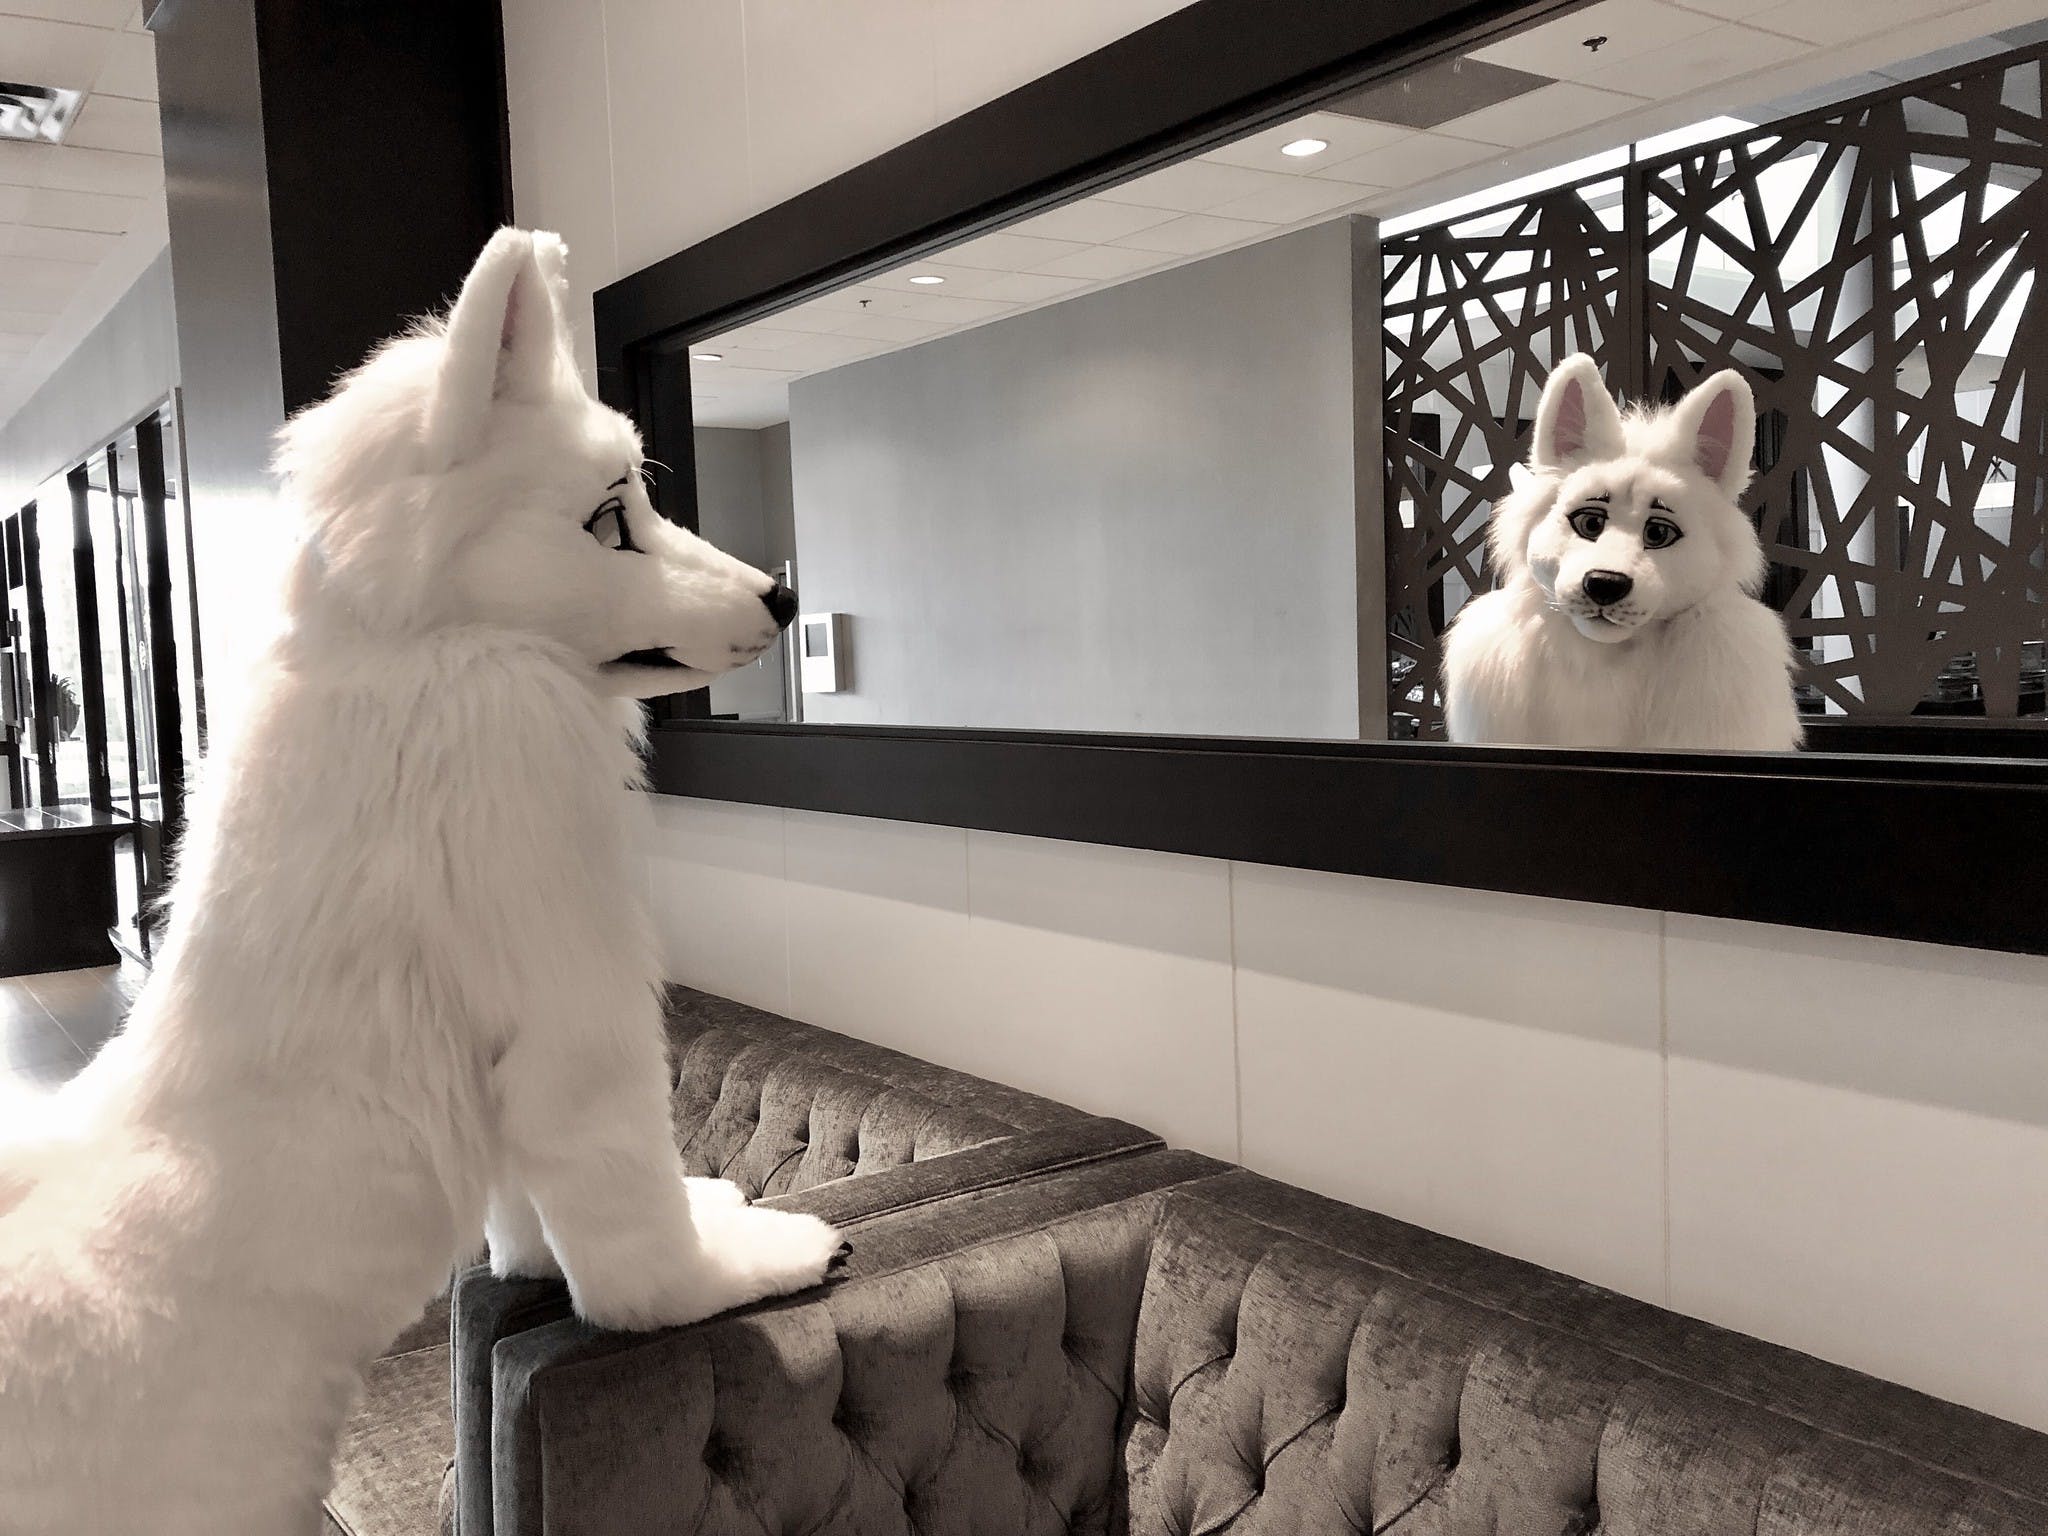
Hopefully The Final Product Looks Something Like This
Image via The Daily Dot
How Much Does It Cost To Make A Fursuit?
If you’ve done any research on getting a fursuit then you know it’s no secret at all that you have to break the bank if you want to get your hands on a half-decent fursuit and they can cost you upwards of $4000. So, how much would it cost to make it yourself you ask? With all the materials required, it can cost anywhere in the ballpark of $500 to $1000. A lot of what you’re paying for when buying a fursuit is the dedication of time and skill of the artist rather than the cost of materials themselves, although that is a big factor.
Now, let’s start making this fursuit.
How To Make A Fursuit Head
Let’s start with what is probably the most integral part of the suit, the head.
To start making the head you’re going to want to wrap a sheet of foam all the way around your head so that it fits relatively loosely and cut away any excess that wraps further around. Now, glue the two ends of the foam together with a hot glue gun to form a cylinder around your head. This is going to act as the fit of your fursuit head.
Then, pinch the top of the cylinder to almost form a foam crown at the top of your head and cut it away so that you can glue a snug seal at the top.
You might need a second person for this part but you’re going to want to draw out eyeholes to cut out that resemble the shape of eyes you would like. Now begin to layer foam on the brow of the head or wherever necessary to bulk it up. Remember, you’re going to layer fur over this, so make sure you have the shape of your head correct. Cut out some conical ear shapes from the foam and start gluing them to the top of your suit or wherever you want the ears to go.
This part is a little more difficult and that is creating the muzzle of the had. For this, you’re going to need to take a fairly long (6 – 12 inches) piece of foam and fold about 2 inches back from the shorter side of the sheet and glue it down. While keeping that indentation folded, fold the whole piece of foam in half from the longer side of the sheet to the other. Glue this to the face of your fursuit head where the snout would go. Look at the shape of your animal’s muzzle and begin layering foam over and underneath this snout to create an actual muzzle and a nose.
Begin to layer foam on either side of the muzzle to create cheeks to finish the foam base of your fursuit head.
Once you are happy with the foundation of your fursuit head begin to wrap it tightly in plastic wrap so that there are practically no air bubbles. Then duct tape over the sections of the suit that you are going to place fur on.
Cut away each section of duct tape and begin to measure it against your fur so that you can have an exact cut out of the shape of fur you will need to paste onto the head. Once you have the cutouts of fur ready, being to sew them together over the head to create what resembles a mask over the foam. Now, glue the mask firmly to the head of the suit.
All that’s left to do now is to shave away the excess fur and cut out a nose for your fursuit head out of felt or any material of your choice.
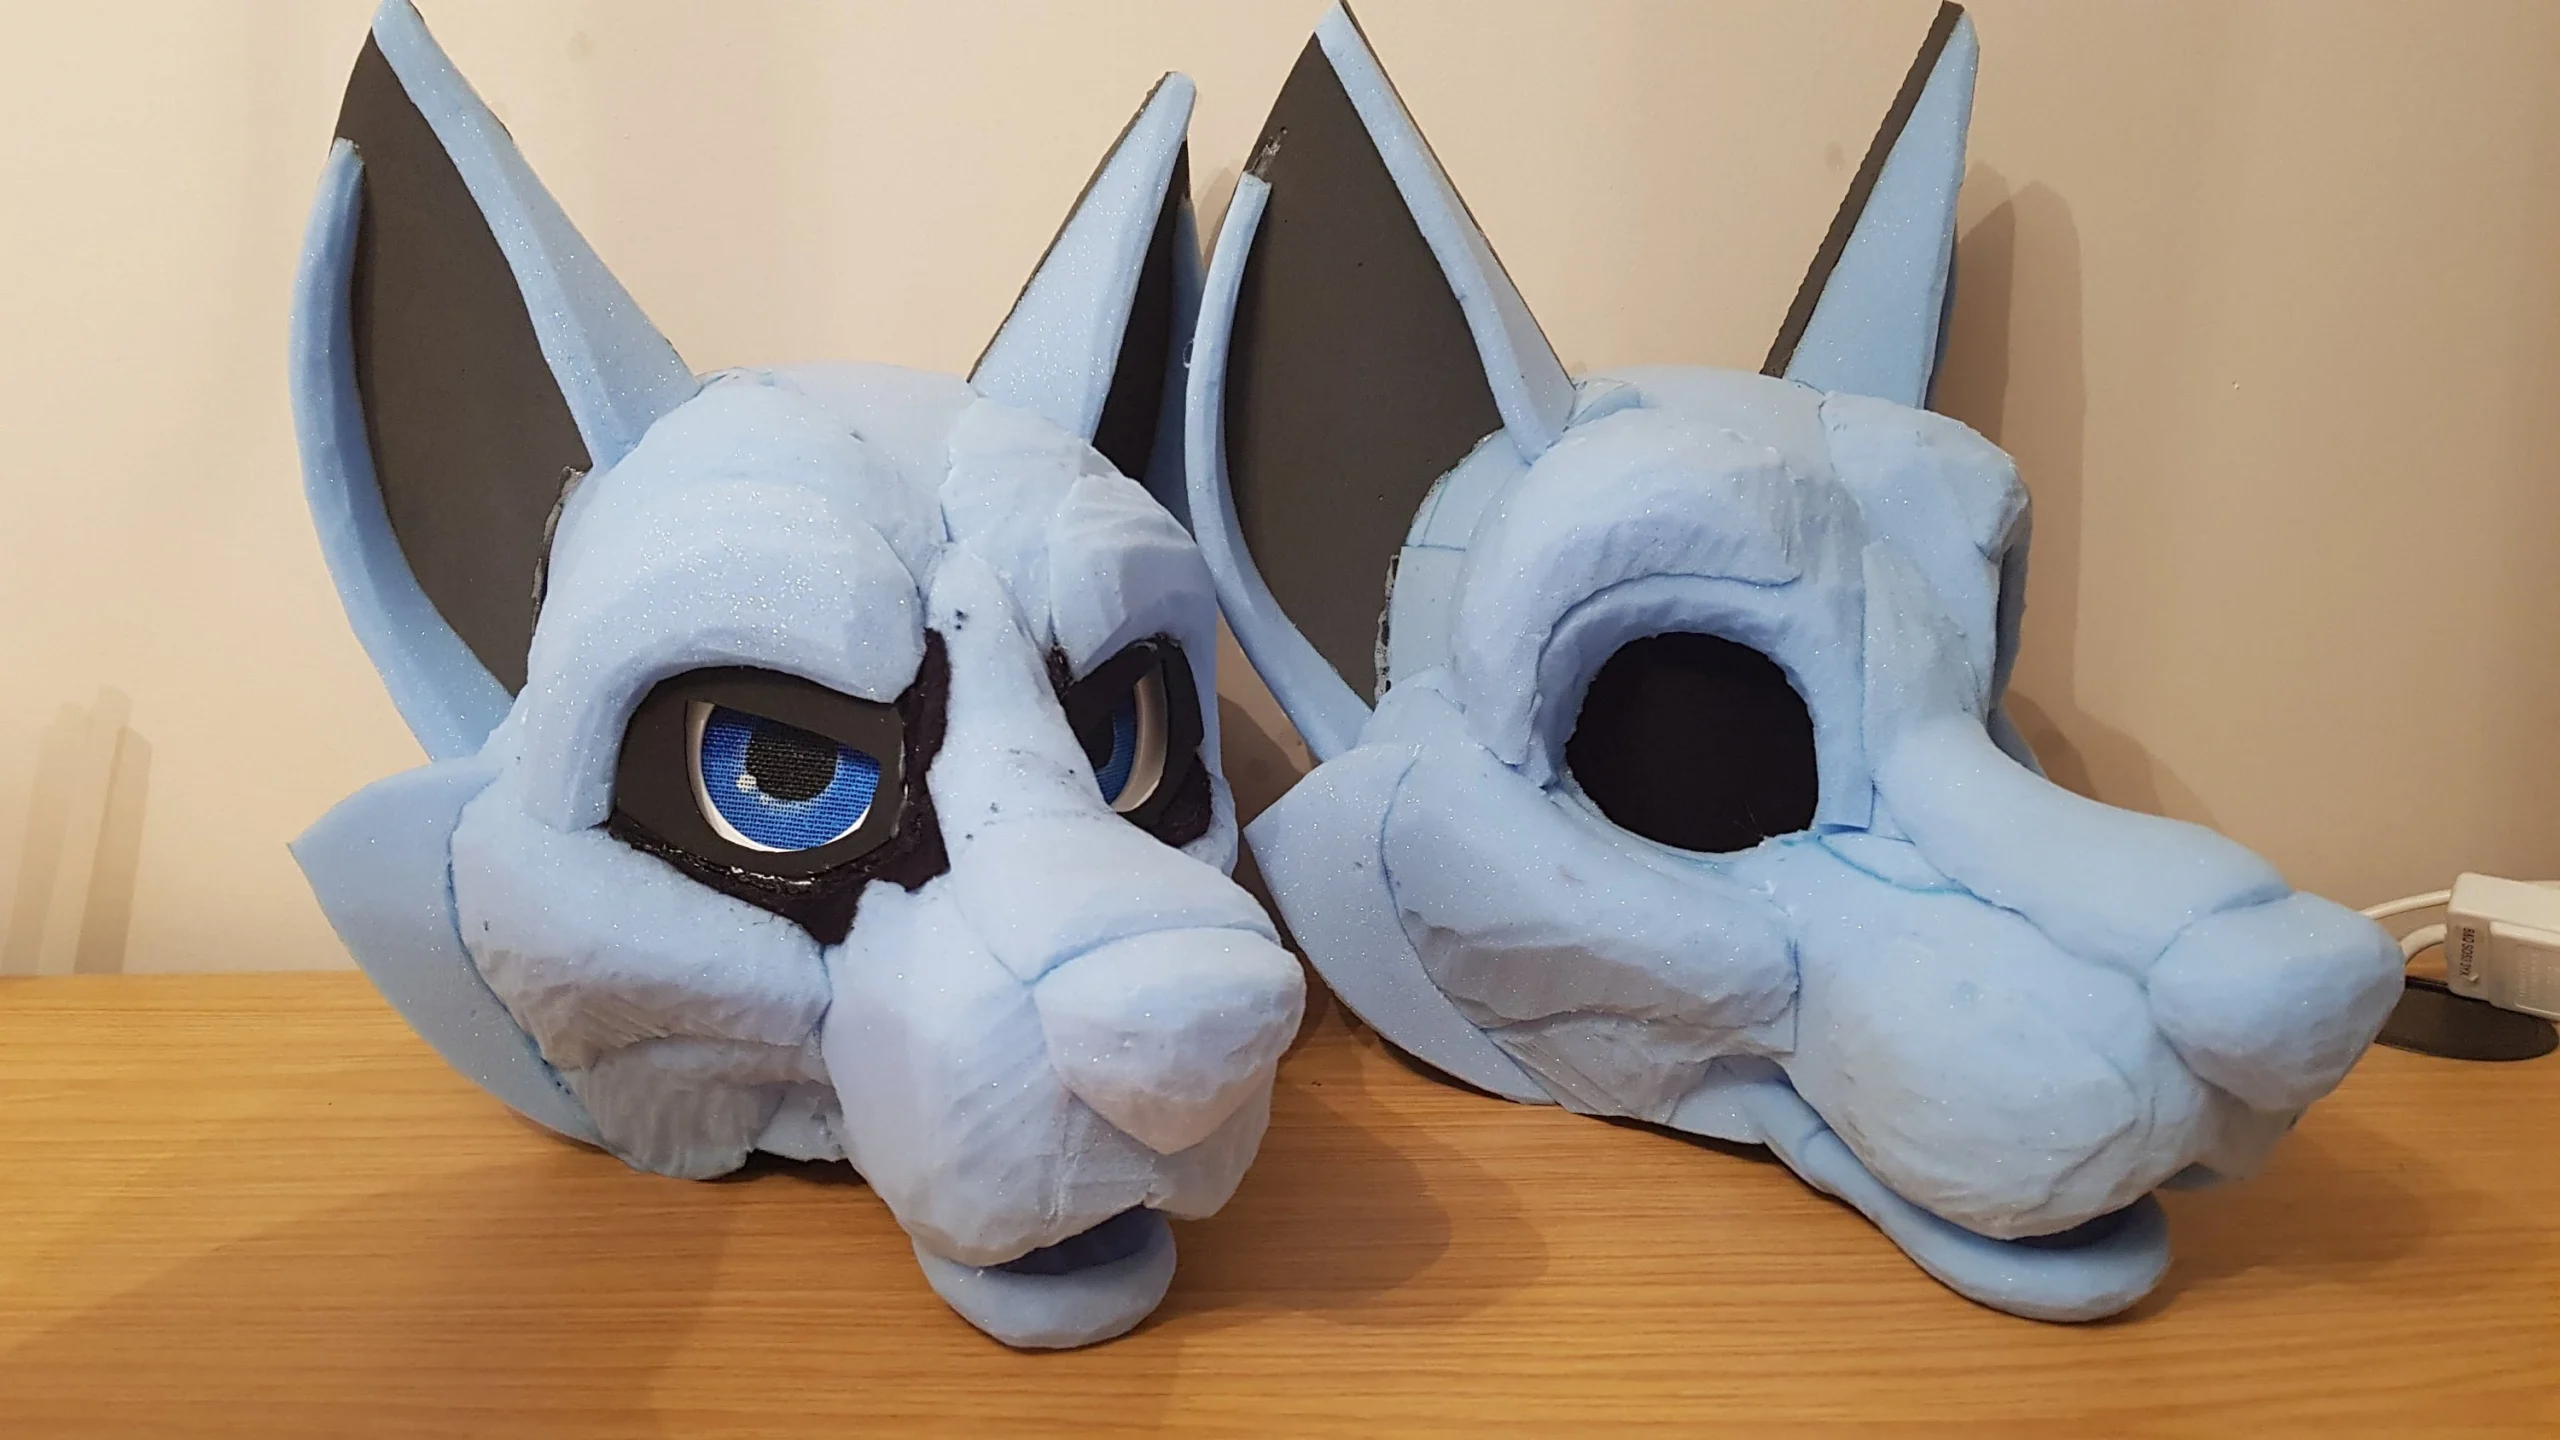
A Fursuit Head’s Foam Base
Image via Etsy
How To Make A Fursuit Body
Making a body for your fursuit can be daunting because it’s the biggest part of your suit, but as long as you are researching it and going about it with relative care, it’s pretty easy. To start, it would help you have a sewing machine as it will make putting the suit together a lot easier, but not to worry if you don’t own one as it can be sewn together by hand as well.
Some people like to make a test pattern before they start applying the pattern of their suit straight onto the suit. This is done by getting a that comes with measurements and modeling your muslin after this. Cut out strips of muslin to create a front and back that you will be able to sew together, leaving a cut for you to get in and out of the suit. Remember when sizing the suit, you’ll likely want the fursuit you be a bit more fitted than a jumpsuit or onesie which is typically quite baggy.
Decide whether you would like the zipper to go onto the front or back of the suit and once you have made that decision just safely pin together the opening until it’s time to add the zipper.
If you intend on adding padding to the body of your suit you can use masking tape on the areas you would like to pad to not only remind yourself of where the padding will go but also to give the padding something to take to when it is plastered on.
Now, once the muslin base of your suit is ready, begin to use a marker to start outlining the areas you would like the fur of your suit to go on to and what color you would like where. Now, begin to cut your pieces of fur to match the shape of the outlines you have drawn and begin to sew the fur to the suit. Make when going over the seams of the muslin you have sewn together so as to not tamper with the fitting you arranged for the suit.
Now let’s install your zipper. Be sure to get a larger-toothed zipper as zippers with smaller teeth can create complications such as fur getting stuck in them, the zipper not zipping smoothly, and a whole list of other complications. Once you have your zipper, place it on the inside of your suit where you initially left an opening for the zipper. Sew up any excess space below the zipper that you no longer need and begin to sew the zipper to the inside of the suit, making sure to avoid getting fur caught in it. You can look to this tutorial for more details on installing a zipper.
Once that’s complete, your fursuit body should be complete!
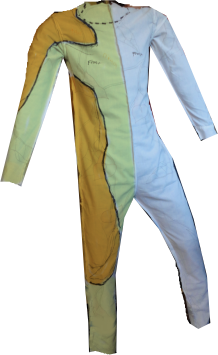
Fursuit Body Should Look Like This Prior To The Fur Being Added
Image via Matrices.net
How To Make Fursuit Hands
The following two parts of the suit aren’t similar at all, so if you are unsure about how to make one, don’t use guesswork to make it. Apart from that, it’s relatively easy. To start making the hands of your fursuit, draw an outline of your fursona’s paw around your own hand on a piece of card. Leave a lot of room around your hand as you don’t want the paw to just about fit onto your hand.
Once you have the outline drawn onto a piece of card, use this card cutout to cut out a piece of the fur with the same dimensions. You’re going to want to do this four times, twice for each hand, as you’re going to sew these 2 pieces together. Do not sew the opening at the wrists together as this is how
Once the pieces of the hand are sewn together, begin to draw outlines of a paw pad onto your vinyl fabric. Do this twice over, once for each hand, and once you are ready, begin to hot glue the vinyl fabric onto the front of your paws.
That should now be your fursuit paws complete.
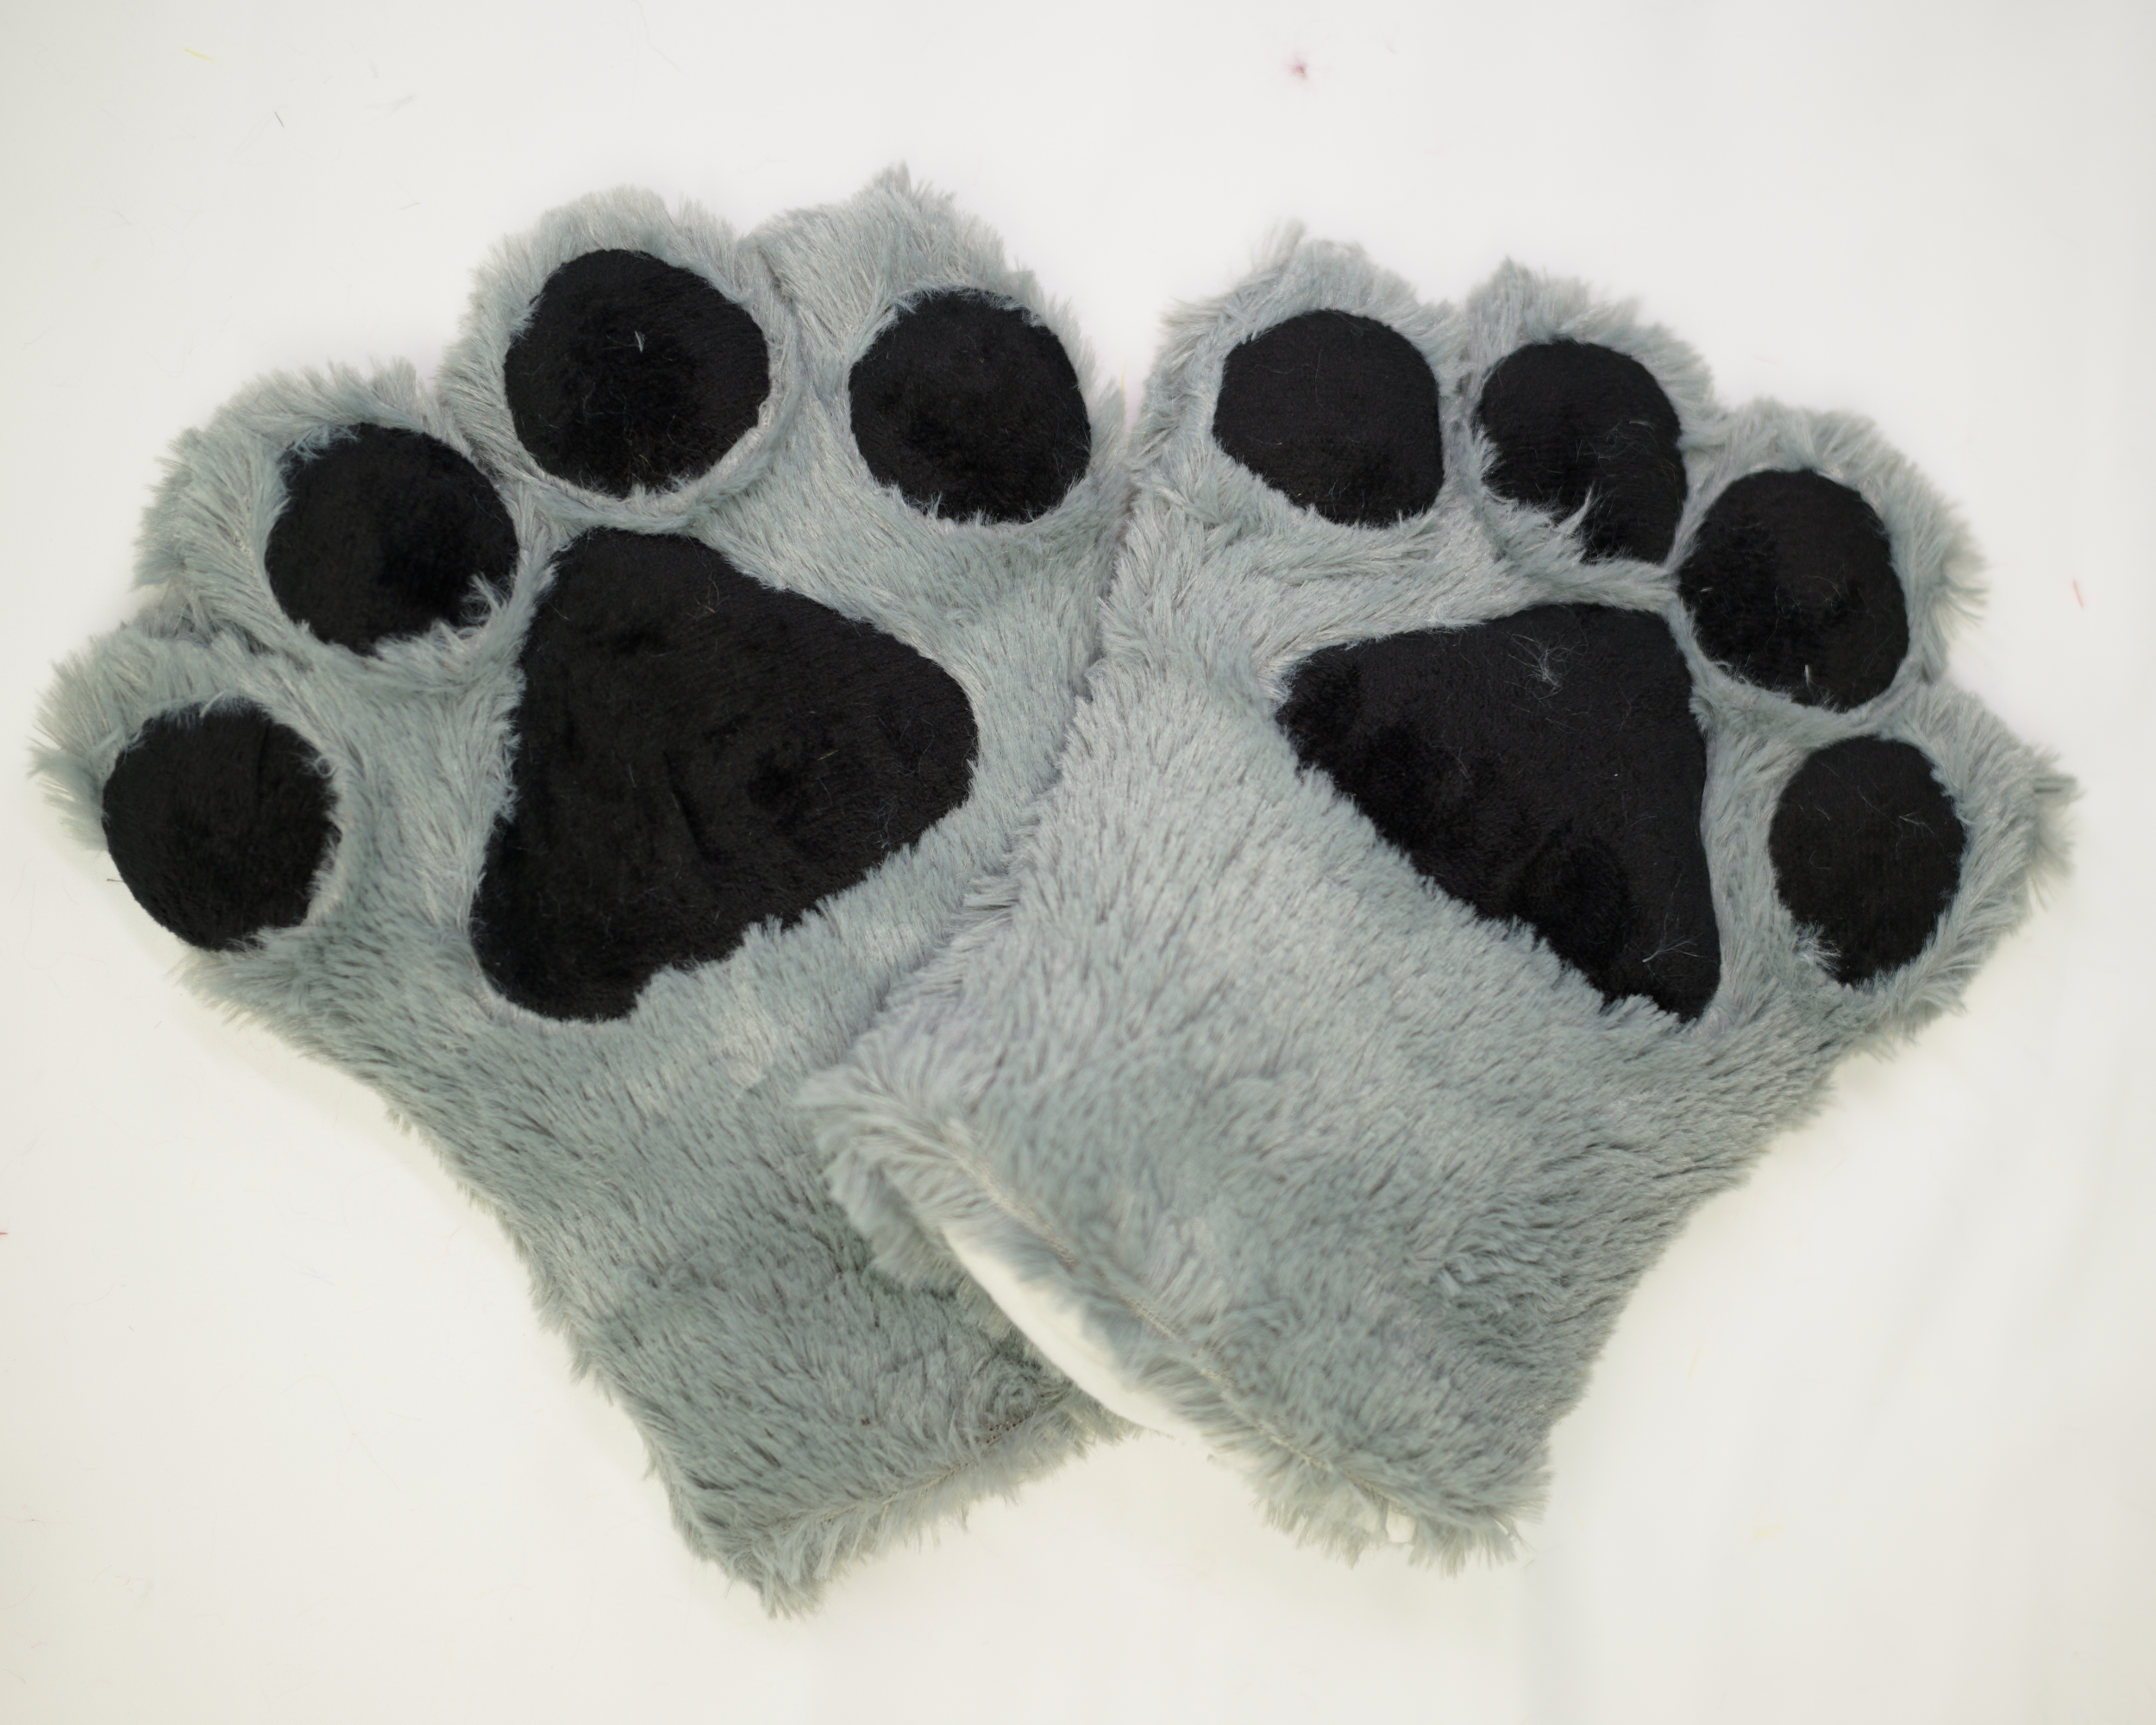
Fursuit Paws Should Look Like This As A Final Product
Image via Fursuit Supplies
How To Make Fursuit Feet
Finally, the feet of your fursuit, without them, how else are you supposed to walk around at a furry con? So, let’s get started.
Start by cutting out an outline of a paw that you could fit your foot into with a reasonable amount of space Do this twice, once for each foot.
Also, for making the feet, you’re going to need a pair of shoes that fit you comfortably and are willing to sacrifice as well as some thicker foam, preferably 5 – 6 inches in thickness as this is what your foot is going to go into. Begin to cut out the shape of the paw that you just drew into the thicker foam.
Now, this is going to sound weird, but you know those two thicker pieces of foam you just cut out, you’re going to want to cut them in half horizontally (not from the toe to the heel). Then, stick your shoes to the center of the thinner piece of foam you originally cut out. It’s all going to make sense soon I promise
Begin to cut away foam from the heel half of the thicker foam until you have two holes in it. One should allow you to put your foot into the shoe, the other should allow the front half of the shoe to protrude out from the foam. Glue this down to the thin layer of foam and glue the padding at the top of the shoe to the shoe itself.
In the toe half of the foot, begin to cut away at the bottom of it until it can fit snugly over the front half of the shoe. Do not cut a hole in the top of it at all, there is no need to, and begin to glue it down to the thin layer of foam so that you now have a whole paw.
You can now start to carve away at the foam so that it is rounder and does a better job of resembling a paw. Do this a second time so that you have two foam bases for your paws.
Because the paws are oddly shaped it is sometimes hard to get the fur to cover certain parts of it, so cut out as many pieces of fur as necessary to cover the entire paw. Begin to glue the fur to the paws until the top is completely covered.
You can choose to leave the bottom blank or you can even put two more sets of paw prints on them, that is completely up to you. Apart from that, your fursuit should be complete.
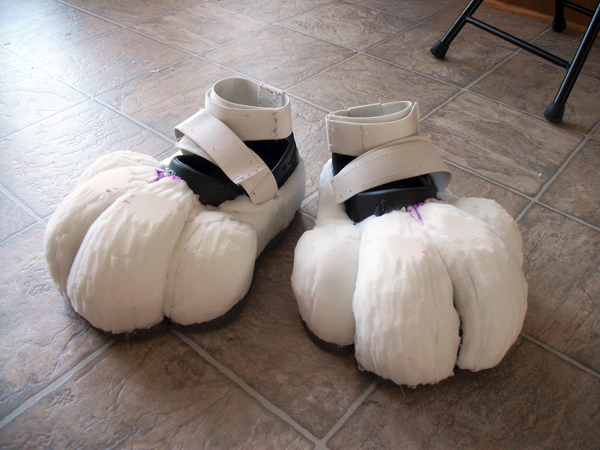
Fursuit Feet Base Will Likely Look Something Like This
Image via Fursuit Live Journal
Where Can I Buy A Custom Fursuit?
If all that just sounds like a bit too much hassle and you’d rather just part with the money to get a high-quality suit there are plenty of places you can look for suits. However, your best bet is to either visit Lemonbrat.com and make a commission there or to put in a query with us via our email address hello@fursonafy.com on our Fursuits page.

